
User's Manual
Here is a step-by-step introduction to building a heat map of your WiFi network coverage.
Select your floor plan
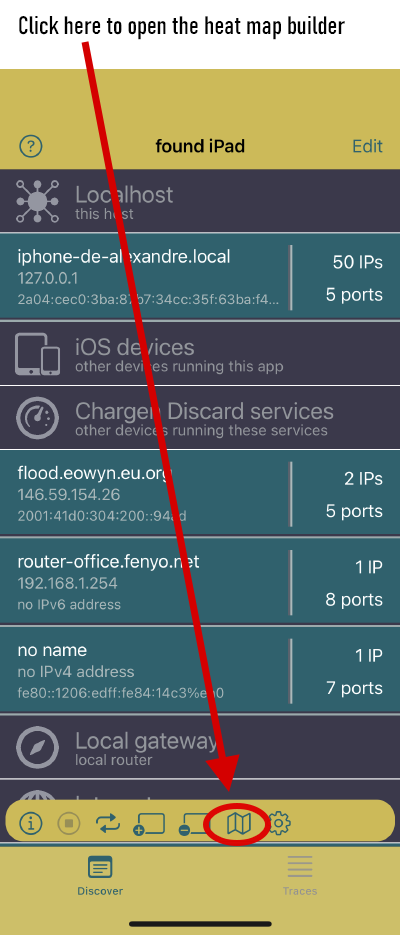
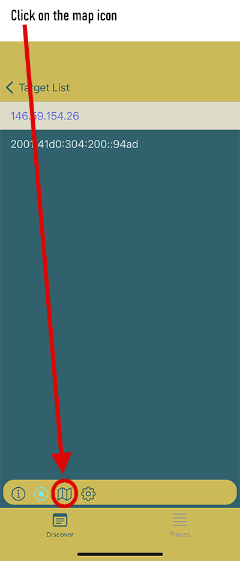
First, open the heat map builder by taping on the map icon.
Now, you need to import your floor plan, by choosing a picture in the Photos app of your device.
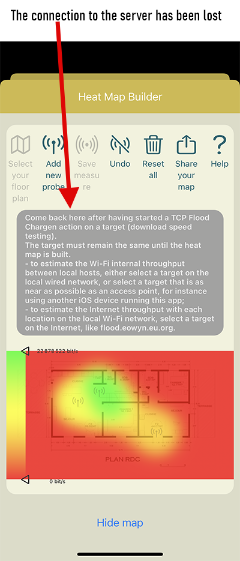
Since you have not selected any target to take throughput measures, you get the following notification message:
| Come back here after having started a TCP Flood Chargen action on a target (download speed testing). The target must remain the same until the heat map is built.
|

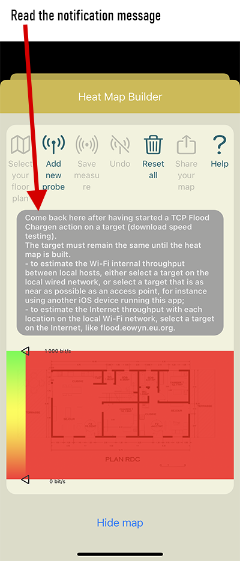
Read the next section to understand what this notification means.
Plan your coverage study
Network 3D WiFi Tools needs to connect to a CHARGEN or DISCARD server to receive (CHARGEN) or send (DISCARD) packets, in order to get measures of the incoming (if receiving packets) or outgoing (if sending packets) throughput. After each measurement, you need to move to another location, to take another measurement at this new location on your floor plan. After having taken a set of 5 to 10 measurements, depending on the size of the area you are aiming to map, you will get an accurate heat map of your WiFi coverage.
Choosing the server is really important because it can impact the measures. Here are some alternatives:
-
you can choose a CHARGEN/DISCARD server on the Internet. The one provided for WiFi Heat Map users is named flood.eowyn.eu.org:
Therefore, here are some examples of using another device running Network 3D WiFi Tools in foreground as a local CHARGEN/DISCARD server:
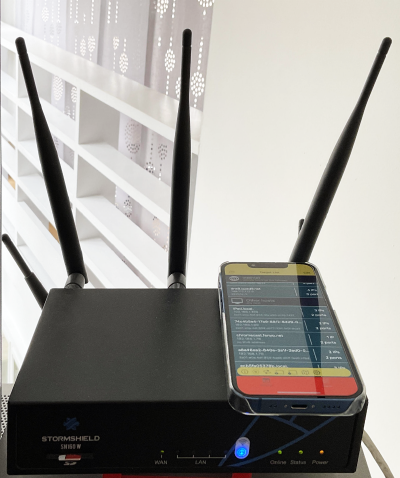
- the server is another iPhone or iPad connected to the same WiFi network, also running Network 3D WiFi Tools in foreground and located as close as possible to a wireless Access Point. Note in the following picture that the server device, an iPhone, notifies with the red bar at the bottom of the screen that some other device running Network 3D WiFi Tools is communicating with it to take measurements:
-
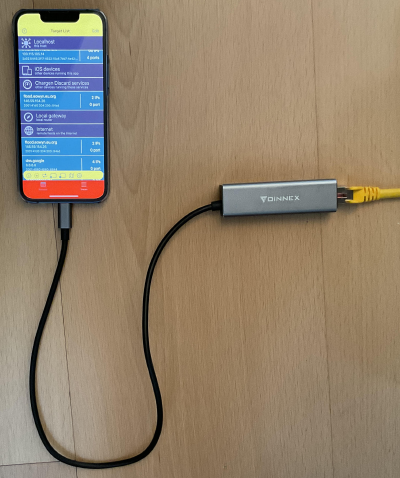
the server is another iPhone or iPad, also running Network 3D WiFi Tools in foreground and connected to a wired network switched to your WiFi network, with an Ethernet/USB dongle (again, note the red bar at the bottom of the screen notifying that this device is used as a server by another device also running Network 3D WiFi Tools):
-
the server is a Mac computer with Apple silicon SoC running Network 3D WiFi Tools (in foreground or background), either directly connected to the WiFi network (and located as close as possible to a WiFi access point), or connected to a wired network switched with the WiFi network:
Connect to the server
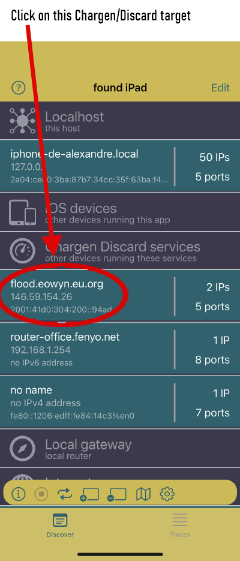
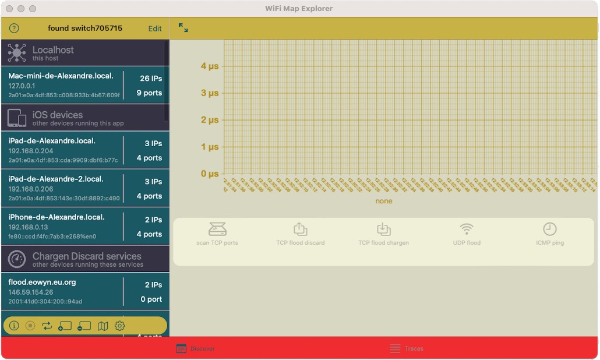
We have chosen a server during the previous steps. Now, find this server in the section named Chargen Discard services of the home screen of WiFi Map Explorer. In this section, you will always find flood.eowyn.eu.org, and in case you would have started Network 3D WiFi Tools in the foreground on another local device (iPad, iPhone, iPod, Mac silicon), you would also find this device in the same section. In the following example, we choose flood.eowyn.eu.org, since we do not have another Apple device connected to our local network:
Come back to the heat map
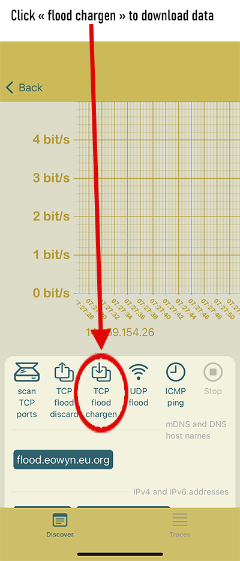
You have now started data download (CHARGEN) or upload (DISCARD) between your device and a local or remote server. This is the time to come back to the heat map builder. Press Back at the top of the screen and tap on the map icon. As you can see, the notification starting with Come back here after having started a TCP Flood Chargen... has disappeared. In the next section, we will see how to take measurements.
Take measurements
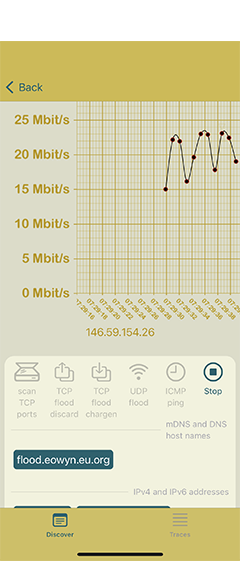
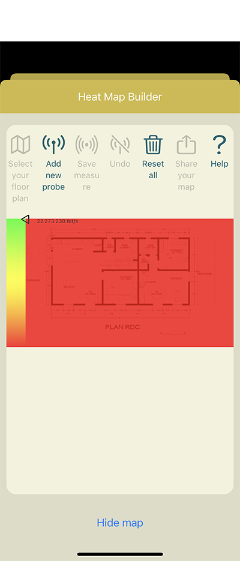
To take a measurement, move to a different location, tap on Add new probe, tap on the screen to identify your location on the floor plan and when the throughput is stabilized, tap on Save measure:

-
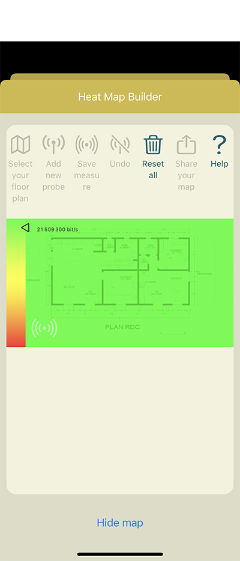
move to another location, tap on Add new probe, tap on the screen to identify your location on the floor plan and when the throughput is stabilized, tap on Save measure.
-
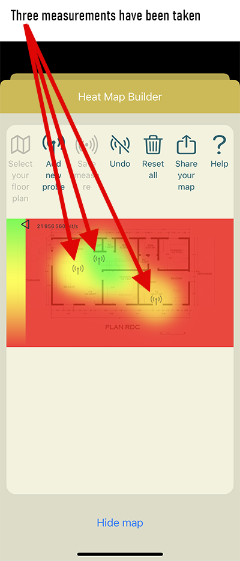
again, move to another location, tap on Add new probe, tap on the screen to identify your location on the floor plan and when the throughput is stabilized, tap on Save measure.

Server connection lost
If the server connection is lost, for instance because you moved outside of the area covered by WiFi, the initial notification message appears again. You just need to restart this connection: tap on Hide map, select the target IP, tap on TCP flood chargen or TCP flood discard, tap on Back and finally tap on the map icon.
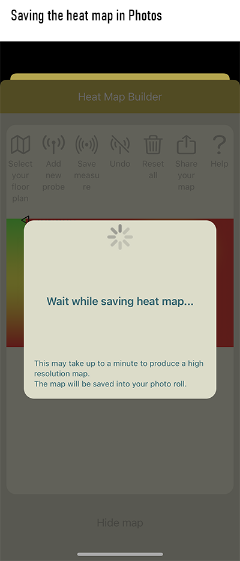
Export the heat map
When you are done with at least 3 measurements, you can save the heat map at the original floor plan resolution in the Photos app of your device: just tap on Share your map. This may take up to one or two minutes, depending on the floor plan original resolution.
Review From Our Users
Huge!
This app offers a huge number of functionalities, and yet remains not difficult to use. No configuration needed, great integration of the tools : just explore the graphical user interface, the embedded help messages will provide useful insights whenever needed ! Worth every penny it costs !
 AgnesLF, — App User
Impressionnant
Idée et réalisation au top! Sans parler du site web et du code source… tout y est! La classe!!! J’adore. Quelques remarques: Peut-être une petite indication sur la (non?) conservation des données serait top. Sur iPhone lors de la création de la heatmap, il n’est pas possible de voir le commentaire sur fond gris entièrement. De plus le léger clignotement est légèrement désagréable 😅 Un petit tuto sur comment orienter la carte serait un nice to have 🤗
 Tyco95, — App User
Très pratique pour bidouilleurs et experts réseaux
La caisse à outil de tout expert réseau, avec des fonctions qu’on ne trouve que dans cette app : implémentation d’un serveur chargen et d’un serveur discard sur votre iPhone (!), affichage d’une heat map de couverture WiFi, débits locaux en plus des débits Internet, affichage des infos Bonjour/mDNS des autres hôtes du réseau local (top pour découvrir les appareils domotiques sur votre réseau perso), etc. L’outil réseau le plus éclectique sur iOS, et en plus téléchargeable gratuitement sur le Mac App Store une fois que vous l’avez acheté sur iOS !!!
 eowyn94, — Developer